Search Results:
Search Results:
Search Results:
Search Results:
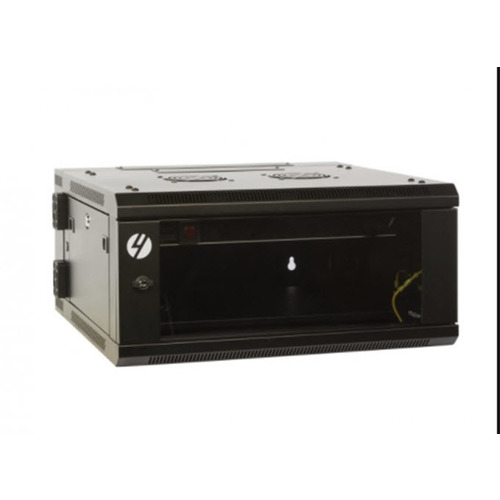
A data cabinet is a sheet-steel enclosure with internal mounting rails set to the 19-inch rack standard. Equipment is fixed to the rails using cage nuts and rack screws. Cabinets are measured in rack units (1U = 44.45mm of vertical space) and ship in sizes from a 6U wall box to a 47U floor frame. The enclosure includes lockable doors, removable side panels, and entry points for power and data cabling.
The cabinet does three jobs at once. It contains and supports the weight of stacked equipment. It restricts physical access through lockable doors and panels. And it provides a defined airflow path, usually front-to-back, that keeps active gear within its operating temperature range. Without a cabinet, the same equipment sits on shelves or floors, exposed to dust, knocks, tampering, and uncontrolled heat.
Data cabinets sit at the centre of structured cabling installs. They terminate horizontal Cat6 runs into patch panels, host the active switches and routers, and provide a clean handoff to patch leads heading out to wall outlets. In AV work they also house matrix switchers, amplifiers, and HDMI distribution. In electrical fit-outs they sit alongside switchboards and provide the comms backbone for everything from CCTV to building automation.
Data cabinets are stocked by both electrical wholesalers and dedicated IT distributors. Electrical wholesalers tend to carry the brands electricians and structured cabling installers specify daily, with stock that aligns with what is on a typical comms rough-in. IT suppliers carry the same physical cabinets but often bundle them with switches, servers, and UPS systems aimed at corporate buyers. For trade work, wholesale supply usually wins on price, lead time, and access to matching accessories like patch leads and termination tools.
Useful suppliers stock the full size range, not just the popular 12U and 18U formats. They carry the matching accessories: punch down tools, cable management, fan trays, blanking panels, and shelves. They publish clear specs (height in U, internal depth, load rating, door type) and they ship quickly enough to keep a job on schedule. Common brands stocked across structured cabling and rack accessories include 4Cabling, DataTek, and Matchmaster for AV-focused installs.
Multi-site rollouts (retail chains, school campuses, builder fit-outs) need consistency across cabinets. Buying through a single trade supplier keeps cabinet make, finish, and accessory parts identical across sites. That matters when an installer needs to know the same spare door key, the same shelf, and the same fan tray will fit every cabinet on every site.
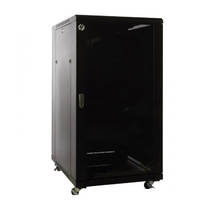
An open rack (sometimes called a 2-post or 4-post frame) is just the vertical rails with no enclosure around them. Equipment is exposed on all sides. An enclosed cabinet wraps the rails inside a steel box with doors and side panels. Open racks are cheaper and offer maximum airflow, but they offer no security, no dust protection, and no way to separate hot exhaust from cool intake.
Enclosed cabinets win on security and on managed airflow. Perforated front and rear doors let air pass through in a controlled direction. Locks restrict who can open the front and rear. Solid side panels keep adjacent cabinets from sharing exhaust heat. Open racks suit dedicated server rooms with whole-room cooling and controlled access. Cabinets suit everywhere else: retail back-of-house, comms cupboards, classrooms, factory floors.
The label "server cabinet" usually means a deeper frame (1000mm or more) with heavier load ratings and stronger frame steel. A standard data cabinet might be 450mm to 600mm deep, which is fine for switches and patch panels but too shallow for rack-mount servers. If the install includes 1U or 2U servers, UPS batteries, or deep audio amplifiers, specify a server-depth cabinet from the outset.
Match the cabinet type to the site, not the other way around. A wall-mount cabinet in a hot ceiling cavity will run hot regardless of fan upgrades. A floor-standing cabinet pushed against a wall loses access to the rear panel. Walk the site, confirm the mounting surface, plan the access path, and check ceiling clearance before specifying.
One rack unit, written as 1U, equals 44.45mm of vertical mounting space. A 12U cabinet has 12 x 44.45mm of usable rail height, which is roughly 533mm. Equipment is sized in U as well: a typical 24-port switch is 1U, a patch panel is 1U or 2U, a small UPS might be 2U, and a rack-mount server runs 1U to 4U depending on chassis depth.
External width is usually 600mm. Internal mounting width follows the 19-inch rack standard (482.6mm between rail centres). Depth varies more. Wall cabinets commonly run 400mm to 600mm deep. Server-grade floor cabinets run 800mm to 1200mm. Always check internal usable depth, not external, because the doors, brackets, and rail offsets eat into the available space.
Add up the U-height of every device, then add 2U for cable management between sections. Add another 2U to 4U for future growth. A switch, patch panel, and small UPS typically fit comfortably in a 9U or 12U wall cabinet. Add a second switch, a router, and a few media converters and the same install needs 15U or 18U.
The cheapest cabinet upgrade is the one that does not happen. Spec one or two size brackets above current need. A 12U site that grows into 14U of equipment forces a full strip-out and replacement. A 15U or 18U cabinet sized at install time absorbs the same growth without any rework.
Every cabinet has two load figures: a static rating (for stationary equipment) and a dynamic rating (for shipping a loaded cabinet). Wall cabinets typically rate 60kg to 100kg static. Floor cabinets run 400kg to 1500kg static. Always size to the static rating with a safety margin of at least 25 percent.
Servers and UPS batteries are heavy. A 2U lead-acid UPS can weigh 30kg on its own. A loaded server cabinet can exceed 500kg. Frames built for this load use heavier-gauge steel, welded corner gussets, and stronger castors or levelling feet. Check the manufacturer's load rating in writing before specifying. Common UPS brands seen in rack-mount installs include CyberPower.
An overloaded cabinet can deflect at the rails, bind doors, distort frame geometry, and in worst cases fail mechanically. The first symptoms are usually doors that no longer close cleanly and rails that bow inward. By the time the frame is visibly out of square, equipment alignment is already compromised.
Always mount the heaviest gear at the bottom. UPS batteries go in the lowest U positions. Servers above batteries. Switches and patch panels in the middle. Light AV gear and shelves at the top. This lowers the cabinet's centre of gravity and keeps it stable, especially for floor-standing units on castors.
Perforated front and rear doors are the baseline. They let cool air enter the front, pass through the equipment, and exit the rear. For low-density installs (a switch, a patch panel, a router) perforated doors alone are usually enough. Perforation must cover at least 60 percent of the door area to be effective.
Higher-density installs need forced airflow. Roof-mounted fan trays sit at the top of the cabinet and pull warm air upward and out. Side-mount fan units add lateral airflow for deep cabinets. Specify fan trays with thermostatic control where possible: the fans run only when internal temperature exceeds the setpoint, which extends fan life and reduces noise.
Active equipment is designed to draw cool air from the front and exhaust hot air from the rear. Mount equipment so this direction is preserved. Mixing front-exhaust and rear-exhaust devices in the same cabinet creates internal recirculation, where hot exhaust from one device is sucked into the intake of another.
Use blanking panels in every empty rack space. Empty U slots act as bypass channels: hot exhaust circles back through them to the front intake, raising intake temperatures. Blanking panels close those gaps and force air to pass through equipment as designed.
If the cabinet is warm to touch on the rear panel, airflow is working. If both front and rear are warm, intake is being recirculated. Add blanking panels first, then a fan tray if temperatures still climb.
Start with the equipment list. Sum the U-heights, note the deepest device, total the weight, and identify any rear-cable equipment that needs rear access. Those four numbers (height in U, depth in mm, load in kg, rear access yes/no) define the minimum viable cabinet.
A home structured cabling install typically needs a 6U to 9U wall cabinet for a router, switch, and patch panel. A small office runs 12U to 18U with the addition of a UPS and possibly a NAS. A commercial site with floor-standing servers needs 24U to 47U with proper depth and active cooling. Industrial sites add IP-rated enclosures and thermostatic management.
Wall cabinets need clear front and side access. Floor cabinets need clear front and rear, plus enough room to swing both doors fully open. Allow a minimum 800mm clearance front and rear for floor units. Check ceiling height: a 47U cabinet on castors stands roughly 2300mm tall before counting any roof-mounted accessories.
The two most frequent mistakes are undersizing depth and undersizing height. Specifying a 450mm-deep cabinet for a 600mm-deep server is unrecoverable: the door will not close. Specifying 9U when 12U was needed forces a re-order with the original cabinet still on site. Both mistakes are avoided with a 10-minute equipment audit before ordering.
Horizontal managers (1U or 2U panels with finger ducts or D-rings) sit between active equipment and route patch leads neatly across the cabinet face. Vertical managers fit alongside the rails and carry cables up and down between U sections. Both are needed in any install with more than a handful of patch leads.
Cabinets ship with knockouts or brush strips at the top, bottom, or both. Top entry suits ceiling-fed cabling (offices, comms cupboards). Bottom entry suits underfloor or slab-fed cabling (server rooms with raised floor). Use the entry point closest to the cable run direction to minimise unnecessary loop length. Most data cabinet feeds use Cat6 from a stocked data cable roll, with brands such as Belden commonly specified for commercial work.
Every cable should be labelled at both ends. A patch lead with no label takes minutes to trace back to its outlet. The same lead with a printed label takes seconds. Maintain a cabinet diagram showing port assignments and circuit IDs, and keep a printed copy inside the cabinet door.
Bundled cabling pressed against the rear of equipment blocks exhaust airflow. Route cables to the sides of the cabinet, not directly behind switches. Leave service loops at every junction so cables can be moved without retermination. Loose, looped cabling is faster to maintain and runs cooler.
Standard cabinets include barrel locks on the front door. Higher-spec models add locks to the rear door and removable side panels. For shared sites (offices with multiple tenants, schools with after-hours access) specify keyed-different locks per cabinet so site managers can restrict access to specific equipment.
Removable side panels make installation easier (cable feeding, equipment lifting) but they also create a security gap if left unlocked. Side panels with quick-release latches should be relocked after every service visit. For high-security installs, specify panels with screw fixings rather than latches.
The lockable doors deter casual interference but not determined attack. For sites where physical tampering is a real risk (public buildings, ground-floor rooms with street access) consider adding intrusion sensors to the cabinet doors and tying them to the building alarm.
In multi-tenant or shared spaces, the cabinet itself is part of the security boundary. Treat the front door key like any other building key: numbered, logged, and recovered when staff leave. Spare keys should not live on top of the cabinet.
Confirm the mounting surface before delivery. For wall cabinets, identify the wall construction (timber stud, steel stud, masonry, plasterboard with no backing) and select fixings rated for the loaded weight. For floor cabinets, confirm the floor is level and the loaded weight is within the floor's structural rating.
A 12U wall cabinet loaded with equipment can weigh 60kg or more. Plasterboard alone will not hold this. Fix into studs, into masonry behind the plasterboard, or use a metal mounting frame that spans multiple studs. For floor cabinets, a fully loaded 42U server cabinet can exceed 800kg and will mark or crack thin tile or vinyl.
Plan the access path. A cabinet that is technically installed but unreachable behind stored stock is functionally inaccessible. Allow the door swing arc to clear, allow space for an installer to stand at the rear, and allow ladder access if the cabinet is mounted high.
Do not push wall cabinets flush against a corner that traps exhaust air. Do not install cabinets directly above or below heat sources (hot-water systems, furnaces, sun-exposed walls). Keep at least 100mm clearance at the rear for exhaust dispersal, more if a fan tray is fitted.
Compliance reminder: Communications cabling work in Australia must follow AS/CA S009 and the relevant ACMA cabling rules. Mains power termination inside the cabinet is electrical work and must be carried out by a licensed electrician under AS/NZS 3000:2018.
Symptoms: equipment shutting down, switch fans running constantly, network drops during hot weather. First fixes: install blanking panels in every empty U, check that the rear door is closed, verify intake is not recirculating from the rear. If temperatures still climb, fit a fan tray and check the room's ambient temperature.
Symptoms: no room for new equipment, patch leads bundled into knots, doors that no longer close. The fix is rarely cosmetic. Either reduce equipment count, move equipment to a second cabinet, or replace the cabinet with a larger size. A reorganisation buys time but does not solve the underlying density problem.
Symptoms: cables tangled at the rear, identifying a patch lead takes minutes, removing one lead disturbs five others. Add horizontal and vertical cable managers, relabel every cable end, and rebuild the patch field with consistent routing. Plan service loops so future changes do not require full reterminations.
Symptoms: cabinet wobbles when doors open, rails deflect under load, doors no longer close evenly. If the cabinet is undersized for its load, no service intervention will restore proper operation. The cabinet must be replaced with a higher-rated frame.
Plan a quarterly inspection. Check that all doors close and lock, that fan trays are running and clean, that no new cabling has been added without management, and that internal temperature is within the expected range. Vacuum dust from filter screens; do not blow dust further into the cabinet with compressed air. Confirm patch field integrity with a network tester as part of any routine service visit.
For larger installs, fit a temperature sensor inside the cabinet and tie it to a monitoring system. Track temperature trends over time. A gradual rise of two or three degrees over months usually indicates dust loading on filters or a failing fan, both fixable before equipment is affected.
Every add, move, or change should be documented. Update the cabinet diagram, the cable labels, and the asset register at the same time. Undocumented changes accumulate and turn a clean cabinet into a difficult one within a year.
Track free U space and free port count over time. When either drops below 20 percent, start planning the next expansion. Specifying a larger cabinet at the next refresh is cheaper than emergency replacement when the existing one fills up mid-project.
Budget cabinets cost less up front and use lighter steel, simpler door hinges, and lower-rated locks. They suit lightly loaded, low-access installs (a single switch in a cupboard). Premium cabinets use heavier-gauge steel, better paint finish, more robust hinges, and higher-rated locks. They suit any install with regular access, heavy load, or multi-year service expectations.
An undersized or poorly cooled cabinet usually shows its cost in equipment failures rather than cabinet replacement. A switch that fails 18 months early because it ran hot costs many times more than the price difference between a basic cabinet and one with proper ventilation.
Standardise on one cabinet make and one or two sizes across a multi-site rollout. Spare parts, keys, fan trays, and shelves all become interchangeable. Service technicians need to learn one product, not five. Sparky Direct supports trade buyers running multi-site jobs.
The cabinet is one of the longest-lived items in a comms install. Switches and routers refresh on a 5-to-7-year cycle. Cabling lasts 15 to 20 years. The cabinet typically outlives several refresh cycles. Spending a little more once means the cabinet still suits the job through three generations of equipment.
The standard office install runs a 12U to 18U wall cabinet in a dedicated comms cupboard. It holds the modem or router from the carrier, the main network switch, a small UPS, and the patch field for floor outlets. Larger offices step up to a floor-standing 24U to 42U cabinet.
Retail stores typically need a small wall cabinet (6U to 12U) at each site for POS networking, EFTPOS, CCTV, and Wi-Fi. Standardising the cabinet model across all sites simplifies stock holding for spares and makes installer training faster.
Factory floors and warehouses need IP-rated outdoor or industrial cabinets where dust, moisture, or temperature extremes are an issue. These cabinets often include thermostatically controlled cooling and weather-sealed cable glands.
Modern homes with structured cabling benefit from a 6U or 9U wall cabinet in a garage, utility room, or hallway cupboard. The cabinet holds the carrier modem, a Wi-Fi controller, a small switch, and the patch field for room outlets, plus AV distribution where fitted. Pair the cabinet with a recessed enclosure in the wall for a clean finish.
AS/NZS 3000:2018 (the Wiring Rules) sets the separation distances between data cabling and mains-voltage cabling. Inside a cabinet, mains and data circuits should not share the same cable path. Where they cross, they should cross at right angles. Power outlets inside the cabinet must be installed by a licensed electrician.
Communications cabling work in Australia must comply with AS/CA S009 (Installation Requirements for Customer Cabling). The work must be carried out by, or supervised by, a person registered with an ACMA-accredited cabler registry. Termination, testing, and labelling all fall under this standard.
Follow safe-load practices for wall and floor mounting. Use fixings rated for the loaded weight with a safety margin. Where the cabinet is in a public or shared area, ensure doors and panels cannot trap fingers or fall under their own weight.
Cabinets in fire-rated cupboards must not breach the cupboard's fire rating: penetrations for cables and conduits need to be properly sealed. Active cooling fans should not draw smoke or hot gases into adjacent fire compartments. Check the building's fire engineering report for specific requirements.
Watch Klein Tools 32317-INS | 6-Piece Insulated Screwdriver Set (Orange and Graphite) video
Watch Klein Tools 32288 | 8-in-1 Interchangeable Insulated Screwdriver Set | 1000V video
Watch Wago 221-2411 | 4mm² 2-Way Inline Splicing Connector | Jar of 60 video

This is an absolutely fantastic product. They are very easy to install, and they make so much sense with respect to the size of the plugs here in Australia. When you've got things you flush against the wall, these recessed outlets are absolutely the way to go. Sparky direct was excellent with their service and speed in which they delivered these outlets.
Perfect solution to sort out any media installation, flush mounts the TV or in my case, hides everything for a corner swing out solution. When you have AC adaptors for the likes of a Chromecast or Firestick, this is perfect.
Purchased for new build, absolute perfect size recessed box, plenty of room for multiple outlets within and room for additional HDMI ect controller boxes/switches.
Quality products in stock • Fast Australia-wide delivery • Competitive trade pricing
Browse Data Cabinets → Get Expert Advice →Installation is straightforward for trained professionals and depends on wall or floor mounting.
Sparky Direct supplies data cabinets Australia-wide, offering reliable network storage solutions with convenient delivery.
Data cabinets are securely packaged and delivered via courier or freight services.
Unused cabinets are generally eligible for return according to the seller’s returns policy.
Warranty coverage varies by manufacturer and typically covers defects in materials or workmanship.
Data cabinets may be supplied assembled or flat packed, depending on the model.
Yes, installation and cabling should be completed by licensed or registered cablers.
They require minimal maintenance beyond keeping them clean and ventilated.
Most cabinets allow space for additional equipment and cable expansion.
Yes, compact cabinets are commonly used in home office network setups.
Yes, enclosed cabinets help protect against dust, accidental contact, and tampering.
They are generally quiet, though installed fans may produce some noise.
Yes, they improve organisation by neatly housing equipment and cables.
Data cabinets are used to house and protect network equipment such as patch panels, switches, routers, and cabling.
The right size depends on the amount of equipment, future expansion, and available space.
Data cabinets help protect equipment, keep cabling organised, and improve safety and appearance.
Yes, they are a key component of structured cabling installations.
Yes, many models include lockable doors or panels for equipment security.
Many cabinets include ventilation slots or fan options to help manage heat.
Most data cabinets are designed to support standard 19-inch rack-mounted equipment.
Yes, they are widely used in offices, data rooms, and commercial buildings.
Yes, smaller wall-mounted cabinets are often used in homes and small offices.
Data cabinets are available in various heights and depths, commonly measured in rack units (U).
Many data cabinets are designed to support installations that comply with relevant AS/NZS cabling and safety standards.
Common types include wall-mounted cabinets, floor-standing cabinets, and open-frame racks.